

Oh, did your phone fall in water? And it seems to be very damaged? Don’t panic! Here you will find all kinds of solutions. What are you thinking? The phone fell in water and the phone can no longer be used. Such incidents happen all the time in the lives of many people, but don’t lose hope. With the right way, you can fix water-damaged phone quickly. Here you will find some proven steps that will help you get your phone back to its previous state. Let’s see the ways.
Table of Contents
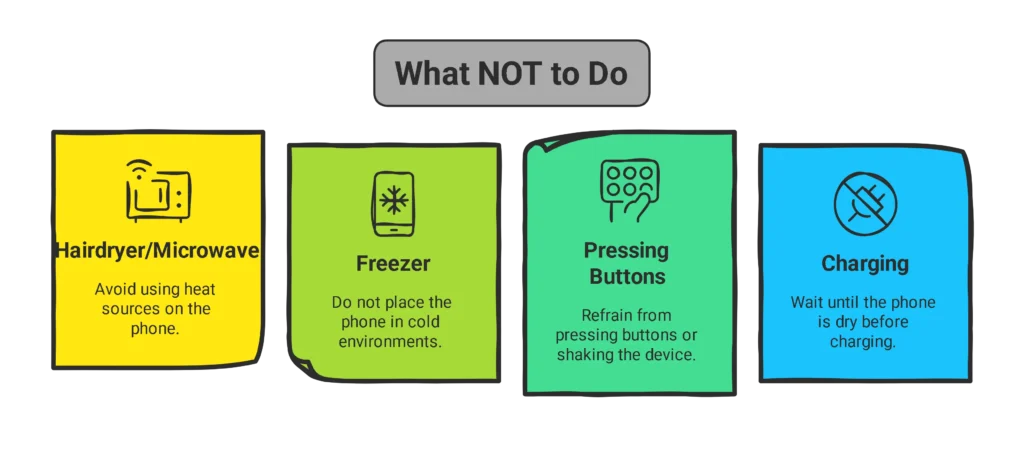
 What NOT to Do:

❌ Do not use a hairdryer or microwave – Heat can damage internal components.
❌ Do not put the phone in the freezer – This can cause condensation and further damage.
❌ Do not press buttons or shake the phone – It may push water deeper inside.
❌ Do not charge the phone until you are sure it is completely dry.
Step 1: Act Immediately
You need to remove the phone from the water quickly. The longer your phone remains in water, the more damage it will cause. So take action as soon as possible and follow the steps given below:
- Turn Off the Phone: To avoid an internal short circuit of the phone, quickly power off the phone if it is powered on.
- Remove it from Water: Remove the phone from the water as soon as possible.
- Avoid Pressing Buttons: Do not press any buttons when removing the phone from the water, as this can cause water from outside to enter the phone.
Step 2: Remove External Components
To minimize damage, you will need to remove all removable parts from the phone:
- Take Out the SIM Card and SD Card: The SIM can be saved even if the phone is water damaged, but for that, you need to remove the SIM from the phone immediately.
- Remove the Battery (if possible): If possible, remove the battery from the phone.
- Remove the Case and Accessories: You will also need to remove all accessories and phone cases from the phone.
Step 3: Dry the Exterior
First, all the water on the outside needs to be dried and as much water as possible needs to be removed from the inside.
- Use a Soft Cloth or Paper Towel: The phone should be gently wiped with a towel or soft cloth to remove the water. Be careful not to shake or blow.
- Avoid Heat Sources: Do not try to dry the phone with a hair dryer, microwave, or oven, as this may damage the phone’s internal components.
Step 4: Absorb Internal Moisture
Follow these steps to remove moisture and water from inside the phone.
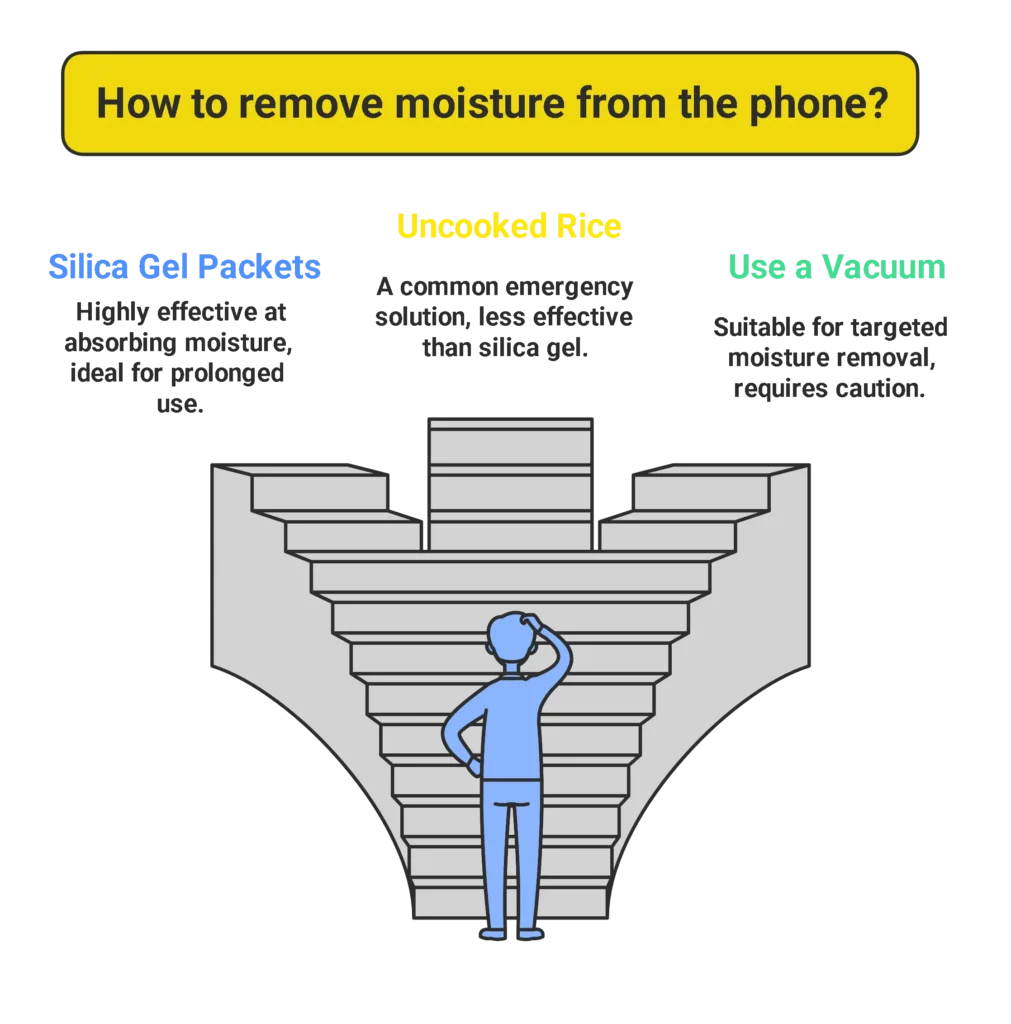
- Option 1: Silica Gel Packets: Place the phone on a silica gel packet (which can be found in shoe boxes, plastic bottles, or other packaging). These packets are very good at absorbing water and moisture, which will easily absorb the moisture inside your phone. The phone should be kept with this gel packet for 24 to 48 hours.
- Option 2: Uncooked Rice(Emergency Method): The phone should be placed inside a packet of dry rice. Dry rice can absorb moisture. But remember that it is less effective than silica gel. In this case too, the timing is 24-48 hours.
- Option 3: Use a Vacuum (Advanced): Vacuum cleaners can also absorb moisture well. But it should not be used everywhere. Use it to gently remove water from only one open area or port. And care should be taken not to damage any other components.
Step 5: Check for Water Damage Indicators
Most smartphones today have a sensor called an LCI that changes color when exposed to water. It is usually located near the SIM card tray, charging port, or battery compartment. You can check online or manually to see where this sensor is located on your phone.
How to understand:
- If the sensor is silver or white in color, it means that water has not entered.
- And secondly, if the color of the sensor changes to pink or red, it means that the sensor has come into contact with water.
So take action after seeing the symptoms.
Step 6: Power On the Phone
So, after performing the above steps, turn on the phone.
- Charge the Phone: If the phone is not powered on, charge it. Even if it is powered on, keep it charged.
- Check for Functionality: Check if all parts of the phone are working, such as screen, buttons, speaker, camera, etc.
Step 7: If the Phone Doesn’t Work
If your phone still won’t power on or isn’t working at all after following these steps, then follow the steps below.
- Visit a Professional: Take your phone to a certified repair shop. They may have special tools that can remove water from inside the phone and help repair water damage on the phone.
- Contact the Manufacturer: If your phone is under warranty, check to see if water damage is covered by your phone’s warranty.(note: most warranties don’t cover water damage)
- Data Recovery: Even if the phone is beyond repair, a professional repairman can still recover all the data on your phone.
Prevention Tips for the Future
- Use a Waterproof Case: Apply a waterproof phone cover to protect your phone from any water damage in the future.
- Avoid Water Exposure: Always keep your phone away from water-related areas such as sinks, pools, and rain and keep it protected.
- Waterproof Phones: Always try to buy a waterproof phone so that these problems do not occur later.
Water damage can be a death sentence for your phone. But your quick action and taking the right steps will determine whether you can fix your phone or not. When your phone gets submerged unexpectedly, every second counts. So, don’t waste time and follow each step. So that you can be aware of such water damage problems in the future and take the right steps. For that, save the article and share it with your relatives and friends and don’t forget to tell us which step you were able to fix your phone for. Stay tuned to USATECHBRO to learn all kinds of problem solving topics related to this.
FAQ- Water-Damaged Phone Solutions
Q. Is rice the best way to dry a wet phone?
Rice absorbs moisture but is less effective than silica gel. So it is very important to use silica gel pack for a best result.
Q. How long should I leave my phone in rice or silica gel?
24-48 hours for best results.
Q. Can I use a hairdryer to dry my phone?
No! Heat can damage internal components in any way. Use natural air drawing or a vacuum instead.